My daughter and I created an App in order to control an Arduino UNO via Bluetooth. The Arduino then controls a servo-motor and an UV LED. The initial idea came from a theater play.
Materials:
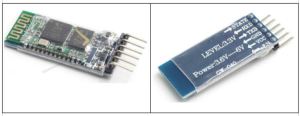
Bluetooth modul HC-05 ( for +5V)
UV LED or any other LED
Circuit:
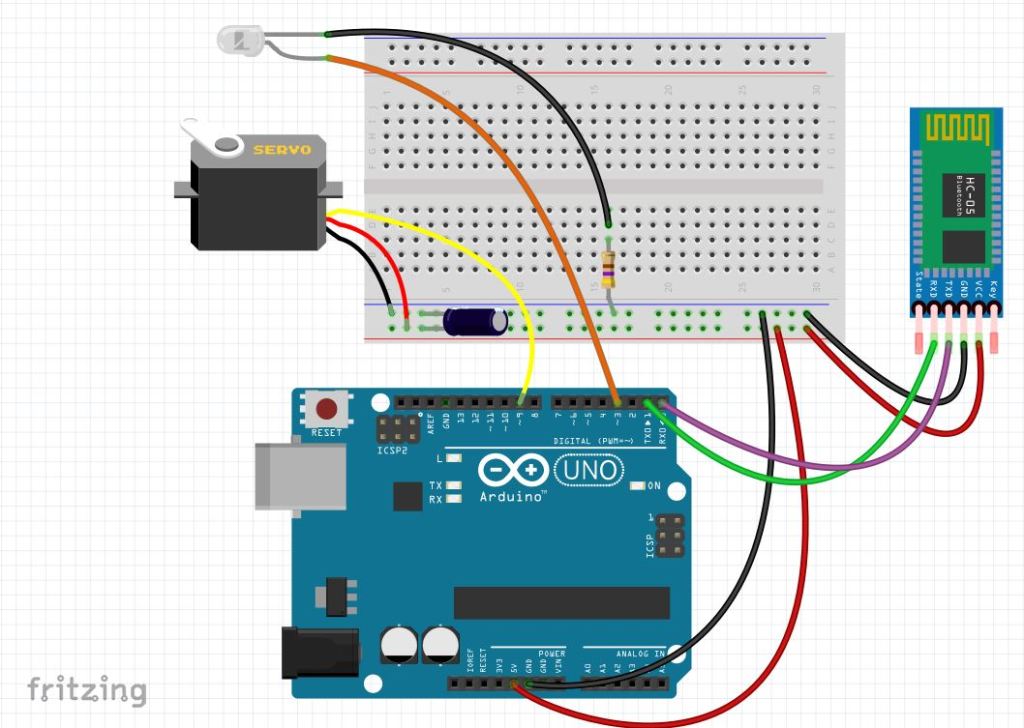
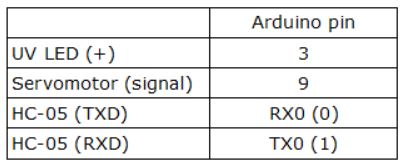
Pin connections:
App with MIT AppInventor:
For more information and tutorials visit their website:
We created a very simple App that has a button to connect to the Bluetooth module and three buttons as interface with the user.
APP interface:

The first part of the code searches for the Bluetooth devices that are available in your surroundings and displays a list where you can then choose your HC-05 module. Once you pick your Bluetooth module, the App will display the message „Connected“:
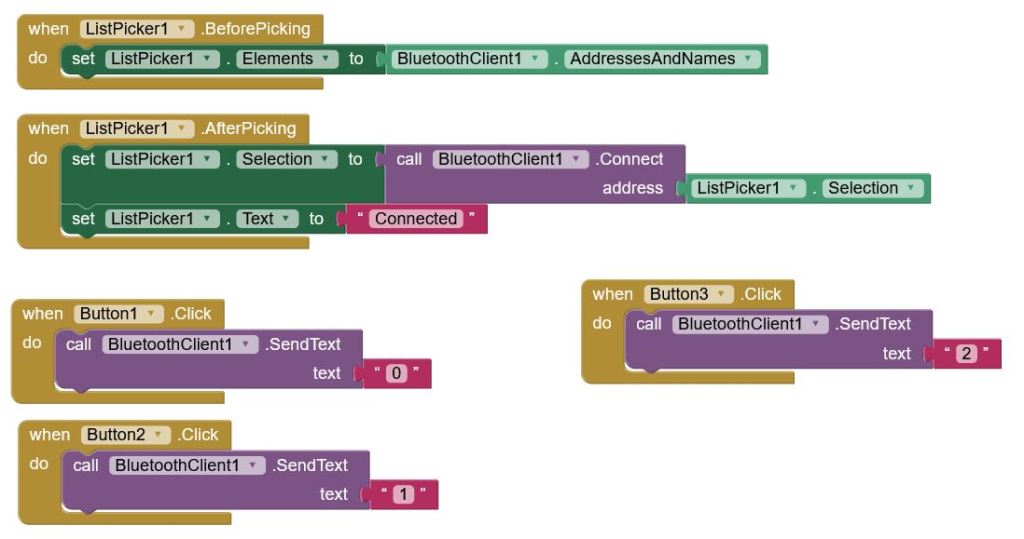
The second part of the code just tells the Bluetooth module which text to send depending on which Buttons the user just clicked.
Arduino code:
The main loop calls three different functions depending on the value that the Bluetooth module received. This value depends on the button that the user clicked on the interface.
IMPORTANT: while uploading the code to your Arduino, you have to disconnect the HC-05 module!
/************* www-mstronik.blog *************/#include <Servo.h>#include <EEPROM.h>int servoPin = 9;int LEDpin = 3;char incoming_value;int pos_adr, last_pos;Servo mvservo;void setup() { // put your setup code here, to run once: pos_adr = 1; Serial.begin(9600); pinMode(LEDpin, OUTPUT); last_pos = EEPROM.read(pos_adr); //mvservo.write(0); go_to_0(); mvservo.attach(servoPin); digitalWrite (LEDpin,LOW); incoming_value = 3; }void loop() { // put your main code here, to run repeatedly: if(Serial.available() > 0) { incoming_value = Serial.read(); //Serial.print(incoming_value); //Serial.print("\n"); switch (incoming_value){ case '0': seq_1(); read_pos(); digitalWrite (LEDpin,LOW); break; case '1': seq_2(); read_pos(); digitalWrite (LEDpin,LOW); break; case '2': seq_3(); read_pos(); digitalWrite (LEDpin,LOW); break; case '3': break; } } }/**************** FUNCTIONS ******************/void read_pos(){ int servo_last = mvservo.read(); EEPROM.write(pos_adr, servo_last); last_pos = EEPROM.read(pos_adr);}void go_to_0(){int xpos; for(xpos = last_pos; xpos>0; xpos--) { mvservo.write(xpos); delay(50); }}void go_to_180(){int xpos; for(xpos = last_pos; xpos<180; xpos++) { mvservo.write(xpos); delay(50); }}void rotate_45L(){ int xpos; for(xpos = 45; xpos>0; xpos--) { mvservo.write(xpos); delay(50); }}void rotate_45R(){int xpos; for(xpos = 0; xpos < 45; xpos++) { mvservo.write(xpos); delay(50); }}void rot_180(){int xpos; for(xpos = 180; xpos >0; xpos--) { mvservo.write(xpos); delay(50); } }void seq_1(){ digitalWrite(LEDpin,HIGH); go_to_180(); rot_180(); delay(200); go_to_0();}void seq_2(){ digitalWrite(LEDpin,HIGH); rotate_45R(); rotate_45L(); digitalWrite(LEDpin,LOW); delay(500); digitalWrite(LEDpin,HIGH); rotate_45R(); rotate_45L();}void seq_3(){ digitalWrite(LEDpin,HIGH); rotate_45R(); rotate_45L(); rotate_45R(); digitalWrite(LEDpin,LOW); delay(250); digitalWrite(LEDpin,HIGH); rotate_45L(); rotate_45R(); rotate_45L(); digitalWrite(LEDpin,LOW); delay(700); digitalWrite(LEDpin,HIGH); rotate_45R(); rotate_45L();}
Examples:
A comet:
A haunted house:

Hinterlasse einen Kommentar