Schlagwort: electronic for kids
-

Simple Timer with LEDs and speaker
inspired by the Arduino Starter Kit example #8: ‚The Digital Hourglass‘, my daughter and I made a simple tea timer using two push buttons to enter two different desired times: 3 minutes and 5 minutes. After pressing any of the push buttons all 6 LEDs will light up. Each one of the 6 LEDs will…
-

Boldport Kits – The Tap and the Cordwood Puzzle Too
Boldport sells many interesting soldering kits, inspired by old famous circuits. We got two of them: We are using „The Tap“ (a touch sensor circuit) to turn on three of the eight LEDs from the „Cordwood Puzzle Too„. The Tap – a touch sensor circuit from 1974 with three touch pads, a reset touch pad…
-
Projekt 02 Spaceship Interface
Kursanleitung für das Arduino Starter Kit. Stecke deine LEDs: Du kannst andere Farben für die LEDs benutzen, z.B.: Stecke die Widerstände zum Minuspol der LEDs. Die 220 Ohms Widerstände können so aussehen: ERINNERUNG: Stecke den Taster: Stecke einen 10 kOhm Widerstand zu dem Taster: Stecke die Kabel zum Arduino: Jetzt kannst du das Programm hochladen…
-
Geschützt: Projekt 08 Digital Hourglass
Es gibt keine Kurzfassung, da dies ein geschützter Beitrag ist.
-
Geschützt: Projekt 07 Keyboard
Es gibt keine Kurzfassung, da dies ein geschützter Beitrag ist.
-
Arduino Starter Kit Code
Du kannst alle Programme auf deinem Arduino IDE hier finden: Datei -> Beispiele -> 10.StarterKit_BasicKit -> … WICHTIG: Vergiss nicht vor dem Hochladen dein Board und dein COM Port korrekt auszuwählen: Werkzeuge → Board→ … Werkzeuge → Port→ … Mehr Info here Falls du den Seriellen Monitor brauchst, klick oben rechts: Schau das die Baudrate…
-
Projekt 06 Light Theremin
Kursanleitung für das Arduino Starter Kit. Stecke deinen Summer oder Piezo: Stecke den Fototransistor: und verbinde das längere Bein zu +: Verbinde das kürzere Bein mit einem 10 kOhm Widerstand zum Minuspol (–) : Stecke die Kabel zum Arduino: Jetzt kannst du das Programm hochladen und deinem Arduinobuch folgen. Du kannst die Frequenzen im Code…
-
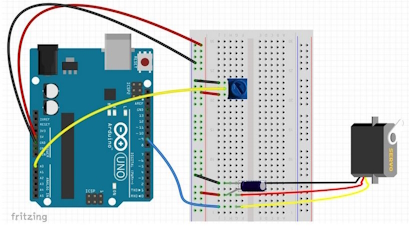
Projekt 05 Mood Cue
Kursanleitung für das Arduino Starter Kit. Stecke dein Potentiometer: Mittleres Bein des Potentiometers zum Analog-Eingang A0 Stecke den Servomotor. Achte auf die Reihenfolge der Pins: rot zum Pluspol, schwarz zum Minuspol. Stecke die Kabel zum Arduino: Stecke den 10µF(decoupling) Kondensator. ACHTE darauf, wo du den Minuspol und den Pluspol steckst, sonst kann der Kondensator explodieren…
-
Geschützt: Projekt 03 Love-O-meter
Es gibt keine Kurzfassung, da dies ein geschützter Beitrag ist.
-
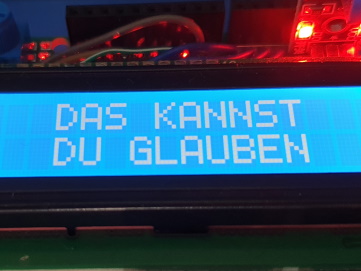
Magic 8 Ball – Arduino Kit Example
The Arduino Starter Kit comes with many examples for beginners. The associated code is included on the Arduino IDE. To open the code on the Arduino IDE, go to: File→ Examples→ 10.StarterKit_BasicKit → … and choose the example you want to work on. For this example we’ve modified the code for the Crystal Ball: The…
-
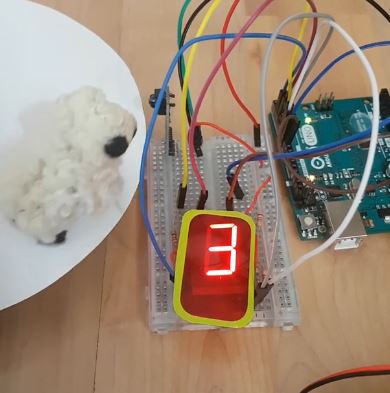
Schafzähler mit Infrarot-Sensor und 7-Segmente-Display
Jedes mal, wenn sich etwas dem Infrarot-Sensor nähert, wird die im 7-Segmente-Display angezeigte Zahl um eins größer. Materialien: Videos: Hardware: Achte auf das Datenblatt, jede Anzeige (Display) hat eine eigene Pinbelegung. Wir benutzen folgendes zweistellige 7-Segment-Display mit gemeinsamer Anode (3261B): Display-Segmente A … G (LEDs) für jede Ziffernstelle (Dig.1 und Dig.2): Jedes Segment (A ……
-

Wearable with Gemma M0 and Accelerometer
Using the microcontroller board Gemma M0 from Adafruit my daughter and I are simulating gravity on the LEDs of the NeoPixel Ring using an accelerometer LIS3DH. The LEDs will light on, following the inclination of the board: If you hold the board completely vertical and you rotate it, the LEDs will light on individually, changing…
-
LED
English Eine LED (auf Englisch: Light Emitting Diode) ist wie eine kleine Lampe, die zwei Beinchen hat: eine Anode (+) und eine Kathode (–). Wenn du die Beine korrekt mit einer Batterie verbindest, leuchtet die LED. Die LED lässt den Strom nur in eine Richtung fließen. WICHTIG: Es ist jedoch ratsam, immer einen Widerstand davor…
