Eine Steckplatine (auch Breadboard genannt) hilft dir, eigene Projekte schnell aufzubauen, ohne löten zu müssen. Wir benutzen dieses Modell einer Steckplatine:
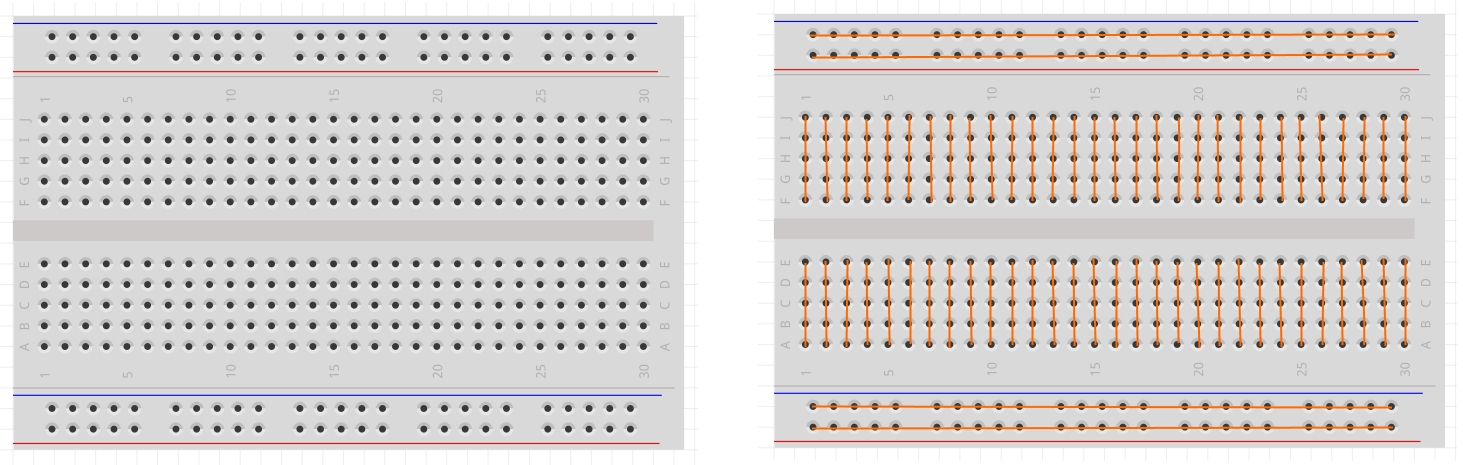
Jedes Loch ist innen mit metallischen Leitern verbunden, wie auf dem Bild rechts zu sehen ist.
Die unteren Leiterbahnen benutzt man normalerweise für die Batteriestecker (blau für den Minuspol, rot für den Pluspol)

Beispiel:
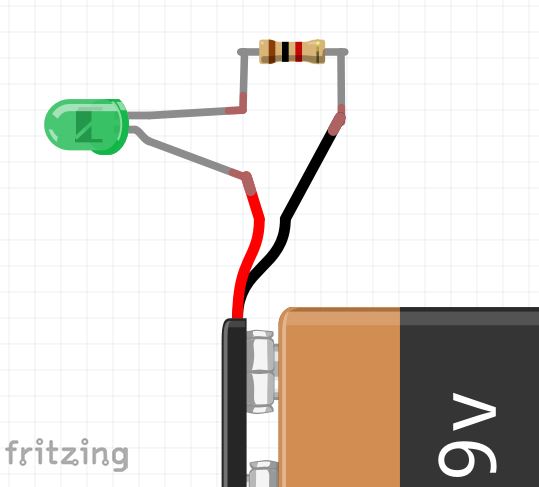
Falls du eine LED zum leuchten bringen möchtest, kannst du sie, einen Widerstand und eine Batterie verbinden oder löten:
Wenn du eine Steckplatine benutzt, ist diese Verbindung einfacher und du musst nicht löten:

Wie unten zu sehen ist, sind die Bauteile innerhalb der Steckplatine mit Hilfe von metallischen Leitern miteinander verbunden:

BREADBOARD
A breadboard helps you to connect easily all the components without having to solder them. We use this model of breadboard in the courses:
Each hole is connected internally with metallic stripes (conductors), as shown in the picture on the right.
The upper and lower conductor tracks are usually used to connect the battery or power lines, blue for the negative pole, red for the positive pole:
EXAMPLE:
If you want to light up a LED , you can connect it or solder it with a resistor and a battery:
If you’re using a breadboard, connecting the parts is easier and you don’t have to solder them:
As can be seen below, the components are connected to one another internally through the metallic conductors:

Hinterlasse eine Antwort zu Schafzähler mit Infrarot-Sensor und 7-Segmente-Display – MStronik Antwort abbrechen