Autor: Magdalena73
-
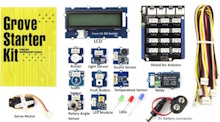
GROVE STARTER KIT FOR ARDUINO -Girls‘ Day 2026 Workshop
As part of a Girls‘ Day program, my daughter and I are preparing a workshop using the Grove-Starter Kit for Arduino. The Grove Kit comes with several sensors that are easy to connect and a shield to connect these modules directly to an Arduino UNO: When we work with a micro-controller like Arduino, we program…
-

Bluefruit Interface with Accelerometer and Bluefruit-App
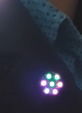
My daughter and I made two interfaces for a theater play using two Circuit Playground Bluefruit from Adafruit and an additional NeoPixel Ring with 24 LEDs (also from Adafruit). The play was called Herzstillstand performed by the group Blue Art e.V. All Circuit Playground boards already come with several built-in sensors, LEDs, and a buzzer,…
-
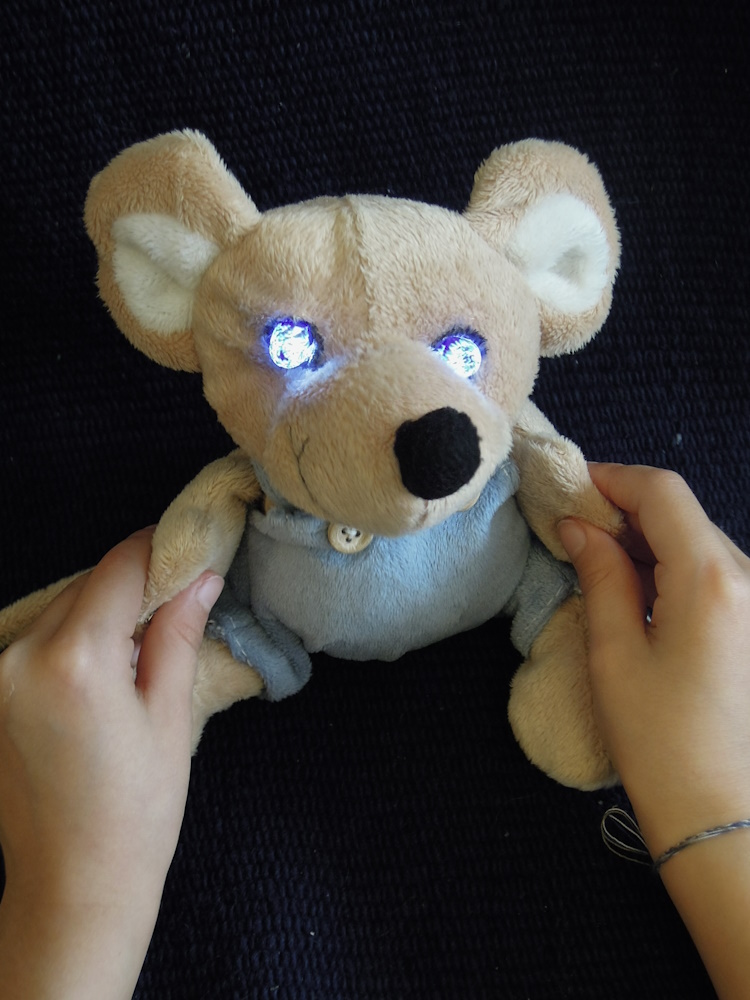
„Leuchti“: Welche Materialien leiten elektrischen Strom?
Sommer Ferienprogramm, NBH-Garching (Ehrenamtlich) Die Kinder werden lernen, wie eine Stromquelle und ein Stromkreis funktionieren. Sodann können sie mit Hilfe von drei Leuchtis (Plüschtiere) herausfinden, welche Materialien den elektrischen Strom leiten können und welche nicht. Die Kinder werden auch ein Bild mit leuchtenden LEDs basteln (nach Fantasie oder Vorlage) und nach Hause mitnehmen. Zusätzlich basteln…
-

Simple Timer with LEDs and speaker
inspired by the Arduino Starter Kit example #8: ‚The Digital Hourglass‘, my daughter and I made a simple tea timer using two push buttons to enter two different desired times: 3 minutes and 5 minutes. After pressing any of the push buttons all 6 LEDs will light up. Each one of the 6 LEDs will…
-

Boldport Kits – The Tap and the Cordwood Puzzle Too
Boldport sells many interesting soldering kits, inspired by old famous circuits. We got two of them: We are using „The Tap“ (a touch sensor circuit) to turn on three of the eight LEDs from the „Cordwood Puzzle Too„. The Tap – a touch sensor circuit from 1974 with three touch pads, a reset touch pad…
-
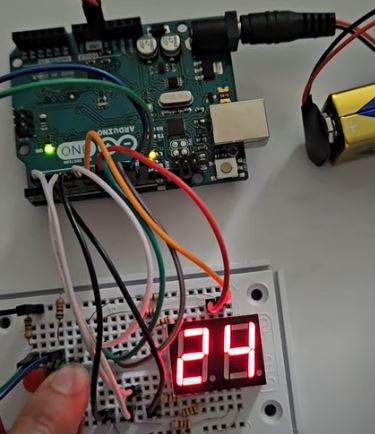
Counter with 7-Segment-Display and two push buttons
My daughter and I made a simple counter with two push buttons. When you press one of the push-buttons you increase the number shown on the 7-segment-display. When you press the other push-button you decrease the number shown on the 7-segment-display. Material: Video: Hardware: The segments for each digit are small LEDs and they are…
-
App for Arduino+Bluetooth HC-05
My daughter and I created an App in order to control an Arduino UNO via Bluetooth. The Arduino then controls a servo-motor and an UV LED. The initial idea came from a theater play. Materials: Arduino UNO Bluetooth modul HC-05 ( for +5V) Small Servomotor SG90 UV LED or any other LED Circuit: Pin connections:…
-
Disco Lights Wearable
Using a Gemma M0 from Adafruit, a Neopixel Jewel and an ALS (Ambient Light Sensor) my daughter and I build up this wearable as Disco Lights. Here is a video: MATERIALS: ° Gemma M0 from Adafruit ° NeoPixel Jewel ° Ambient Light Sensor TEMT6000 ° Conductive Thread to stitch all together on the garment. We…
-
Projekt 02 Spaceship Interface
Kursanleitung für das Arduino Starter Kit. Stecke deine LEDs: Du kannst andere Farben für die LEDs benutzen, z.B.: Stecke die Widerstände zum Minuspol der LEDs. Die 220 Ohms Widerstände können so aussehen: ERINNERUNG: Stecke den Taster: Stecke einen 10 kOhm Widerstand zu dem Taster: Stecke die Kabel zum Arduino: Jetzt kannst du das Programm hochladen…
-
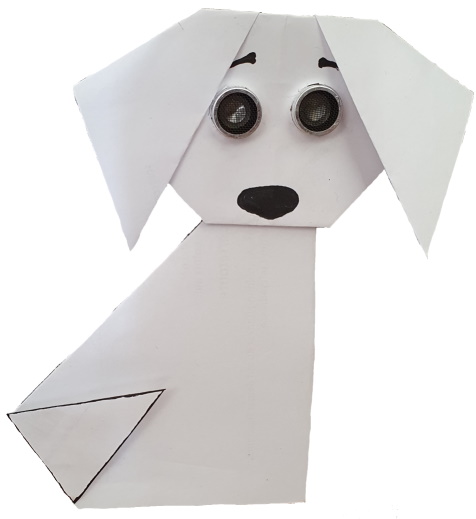
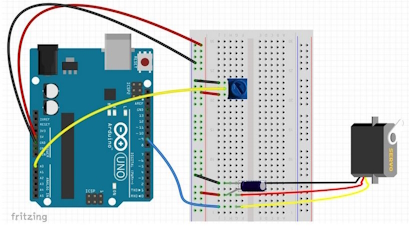
Greeting Puppy
Here is a prototype for a greeting puppy using an Arduino, an ultrasonic sensor (for the eyes) and a servomotor (for the tail). The puppy will wiggle its tail faster as you come closer 🙂 The hardware connections are as follows: For us it was better to use an extra battery pack for the servomotor.…
-
Geschützt: Projekt 08 Digital Hourglass
Es gibt keine Kurzfassung, da dies ein geschützter Beitrag ist.
-
Geschützt: Projekt 07 Keyboard
Es gibt keine Kurzfassung, da dies ein geschützter Beitrag ist.
-
Arduino Starter Kit Code
Du kannst alle Programme auf deinem Arduino IDE hier finden: Datei -> Beispiele -> 10.StarterKit_BasicKit -> … WICHTIG: Vergiss nicht vor dem Hochladen dein Board und dein COM Port korrekt auszuwählen: Werkzeuge → Board→ … Werkzeuge → Port→ … Mehr Info here Falls du den Seriellen Monitor brauchst, klick oben rechts: Schau das die Baudrate…
-
Projekt 06 Light Theremin
Kursanleitung für das Arduino Starter Kit. Stecke deinen Summer oder Piezo: Stecke den Fototransistor: und verbinde das längere Bein zu +: Verbinde das kürzere Bein mit einem 10 kOhm Widerstand zum Minuspol (–) : Stecke die Kabel zum Arduino: Jetzt kannst du das Programm hochladen und deinem Arduinobuch folgen. Du kannst die Frequenzen im Code…
-
Projekt 05 Mood Cue
Kursanleitung für das Arduino Starter Kit. Stecke dein Potentiometer: Mittleres Bein des Potentiometers zum Analog-Eingang A0 Stecke den Servomotor. Achte auf die Reihenfolge der Pins: rot zum Pluspol, schwarz zum Minuspol. Stecke die Kabel zum Arduino: Stecke den 10µF(decoupling) Kondensator. ACHTE darauf, wo du den Minuspol und den Pluspol steckst, sonst kann der Kondensator explodieren…
-
Geschützt: Projekt 03 Love-O-meter
Es gibt keine Kurzfassung, da dies ein geschützter Beitrag ist.
-
Schadensvermeidende Regeln
1. Pluspol (+ rote Kabel) und Minuspol (– schwarze Kabel) von der Batterie sollten sich nicht berühren!!! Achte darauf, dass alle Verbindungen richtig sind bevor du die Batterie verbindest!!! 2. LED immer mit Widerstand verwenden, sonst brennt die LED durch (geht kaputt): 3. Kurze Beine vermeiden das Risiko eines Kurzschlusses und sehen übersichtlicher aus: 4.…
-
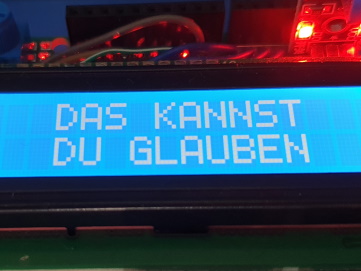
Magic 8 Ball – Arduino Kit Example
The Arduino Starter Kit comes with many examples for beginners. The associated code is included on the Arduino IDE. To open the code on the Arduino IDE, go to: File→ Examples→ 10.StarterKit_BasicKit → … and choose the example you want to work on. For this example we’ve modified the code for the Crystal Ball: The…
-
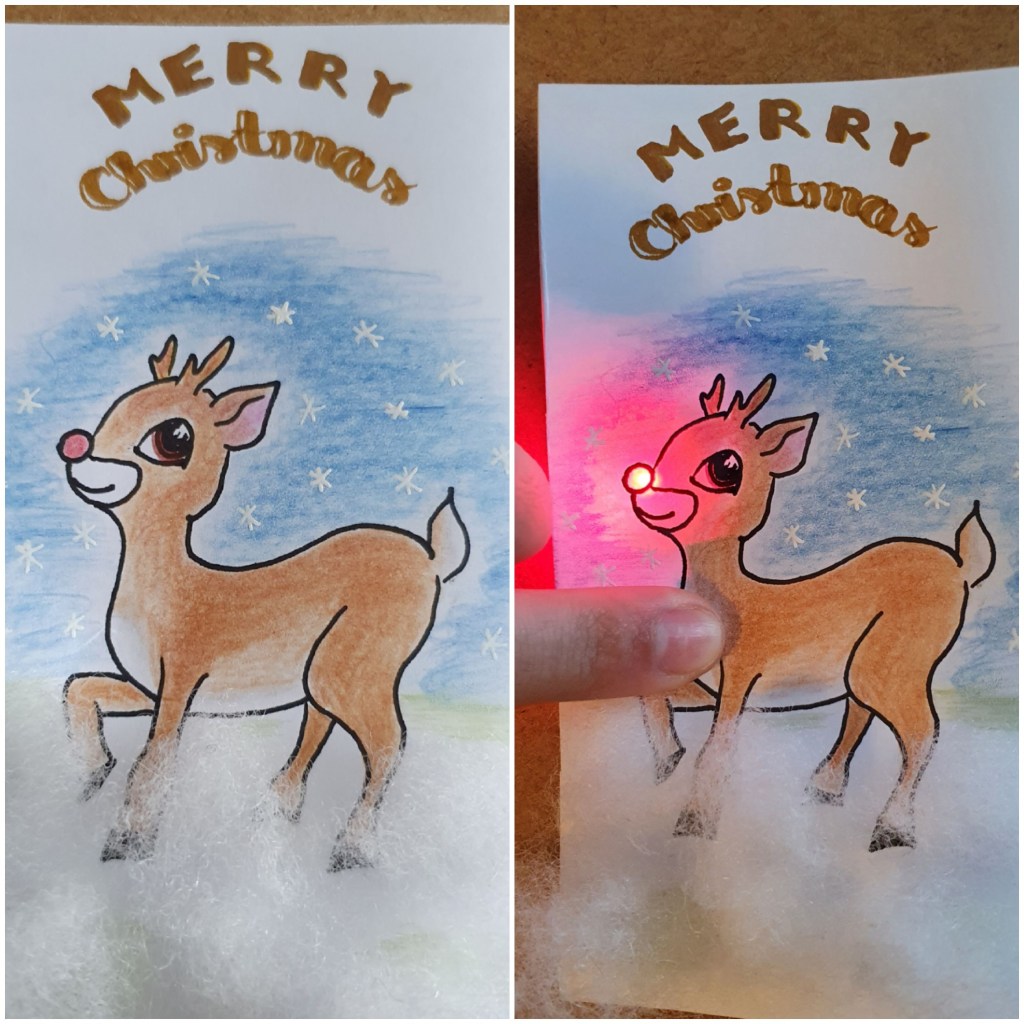
Holiday cards with LEDs
If you enjoy tinkering with your kids or on your own, here are some ideas to light-up your self-made holiday cards. You will need some LEDs, copper tape and a CR2032 cell battery. I like to use axial LEDs because they are small and flat, so the card will not look bulky. Also you don’t…
-

Bluetooth Interface
The main idea of this project is to send some information from your cell phone (through an App) to your Arduino via Bluetooth and then to display this information on an OLED Display. I found this project originally published by circuitdigest.com on how to build a basic Smart Watch Interface easy to follow and well…
